In today's digital age, ensuring the security of your website is of paramount importance. One of the most effective ways to safeguard your website and protect sensitive user information is by installing an SSL (Secure Sockets Layer) certificate. In this blog post, we will guide you through the step-by-step process to install SSL certificate in Windows, helping you enhance the security and credibility of your website. Here before the SSL certificate how to install the stepwise process, you will also get to know what SSL is. So let us begin.
SSL stands for Secure Sockets Layer. It was the original cryptographic protocol used to establish a secure and encrypted connection between a web server and a web browser. However, SSL has been deprecated and replaced by Transport Layer Security (TLS), which is the updated and more secure version of the protocol.
The SSL/TLS protocol is essential for secure communication over the internet. It ensures that the data transmitted between a web server and a web browser remains private and secure from unauthorized access or tampering. It acts as a digital "passport" that authenticates the identity of your website and establishes a secure connection. It is also known as a website security certificate.
SSL/TLS is widely used to secure various types of internet communication, including websites, email servers, FTP servers, and more. It provides an essential layer of security to protect sensitive information such as passwords, credit card details, and other personal data from being intercepted or manipulated by attackers.
Note:
To begin the SSL certificate installation process, you'll need to generate a CSR, a file containing your website's identification information. You must generate a certificate signing request (CSR) and submit it to SSL.com for signing and validation. This can be done using the Internet Information Services (IIS) Manager or other SSL Windows certificate management tools. You also need to go for domain authentication which is done by creating a .well-known directory.
Following are the comprehensive steps that you can follow to download and install an SSL certificate from SSL.com in Windows Internet Information Services (IIS) Manager:
Step 1: Locate Certificate Order
You need to purchase an SSL certificate for a website from a trusted Certificate Authority (CA) like SSL.com. On SSL.com, you can locate it easily and click on any of the download options as shown in the image.
Step 2: Download the certificate
Then, a display like the image given below will appear on your screen, you have to select the download option in the column having Microsoft IIS in the table. After downloading, check and ensure that the certificate matches the details provided in the CSR.
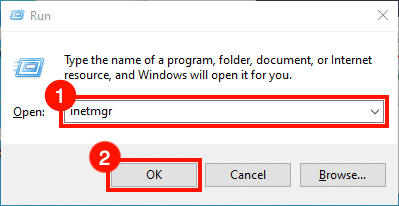
Step3: Start IIS Manager
To do so, the simplest way used by most people is the Run command, open it and then type inetmgr and click on the OK button.
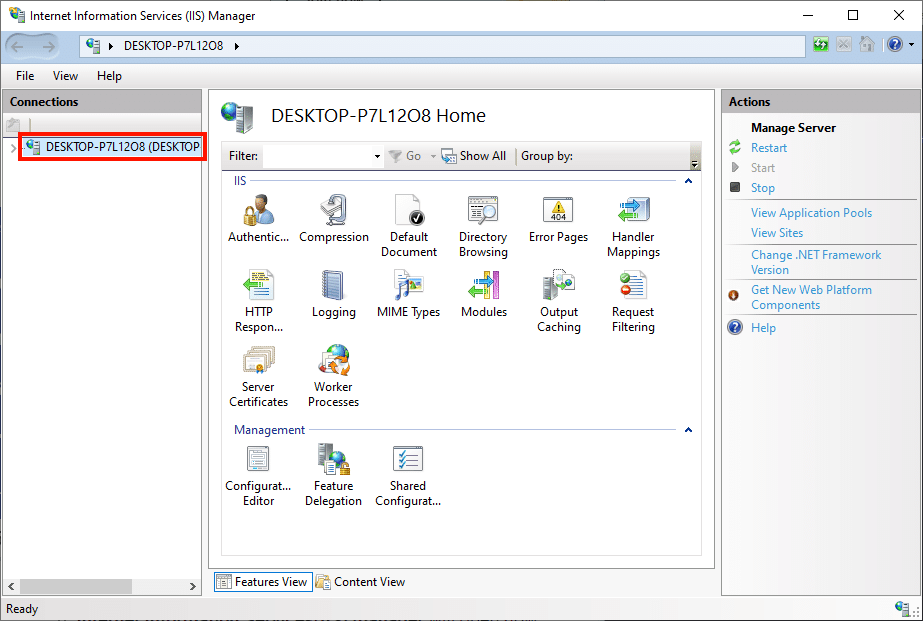
Step 4: Select Server
To choose the server, navigate to the Connections pane situated on the left side of the window and select it.
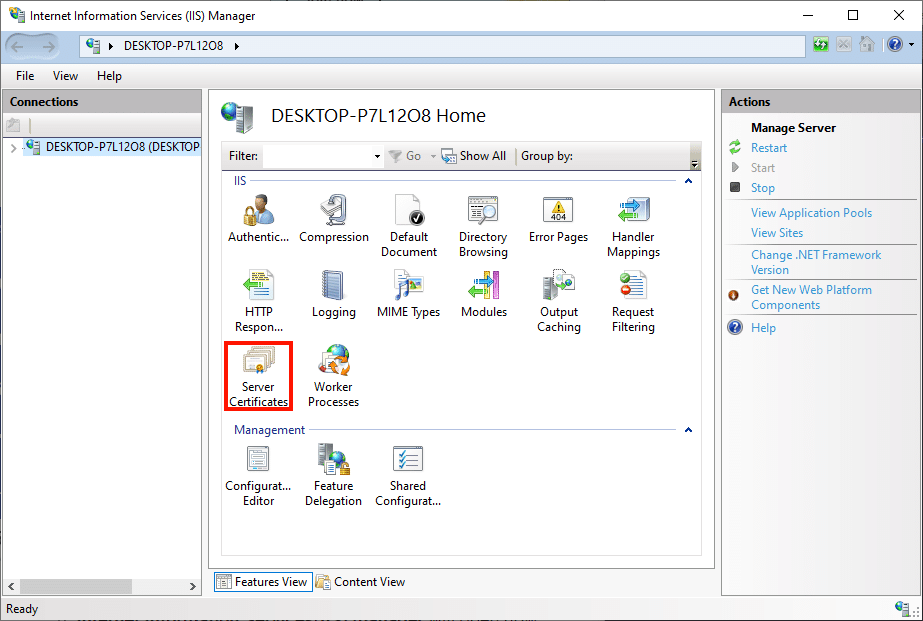
Step 5: Open Server Certificates
Open the window for Internet Information Services (IIS). In the center pane of the window, locate the icon for Server Certificates. Double-click the Server Certificates icon.
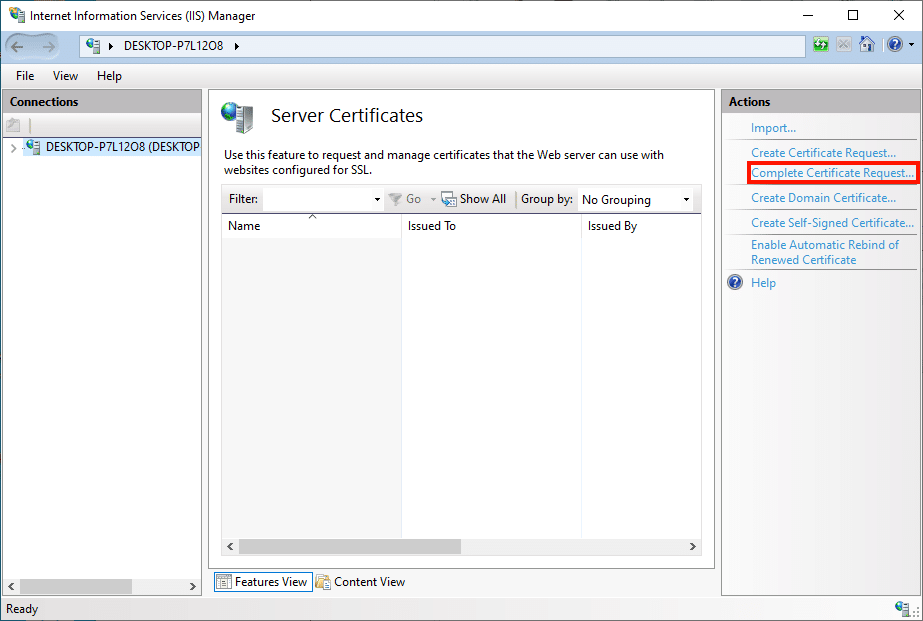
Step 6: Click “Complete Certificate Request…”
Locate the Actions pane situated on the right side of the window. Click on the option labelled "Complete Certificate Request..." within the Actions pane.
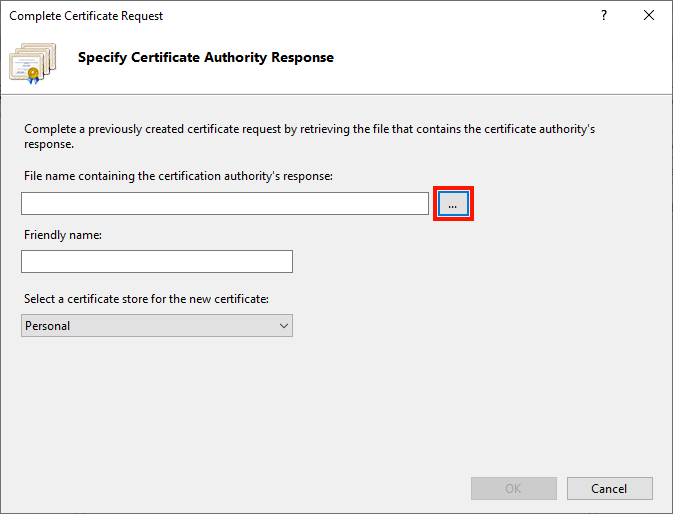
Step 7: Click … button
You will encounter the Complete Certificate Request wizard. Begin by selecting the button labelled "..." to access the file open dialog box.
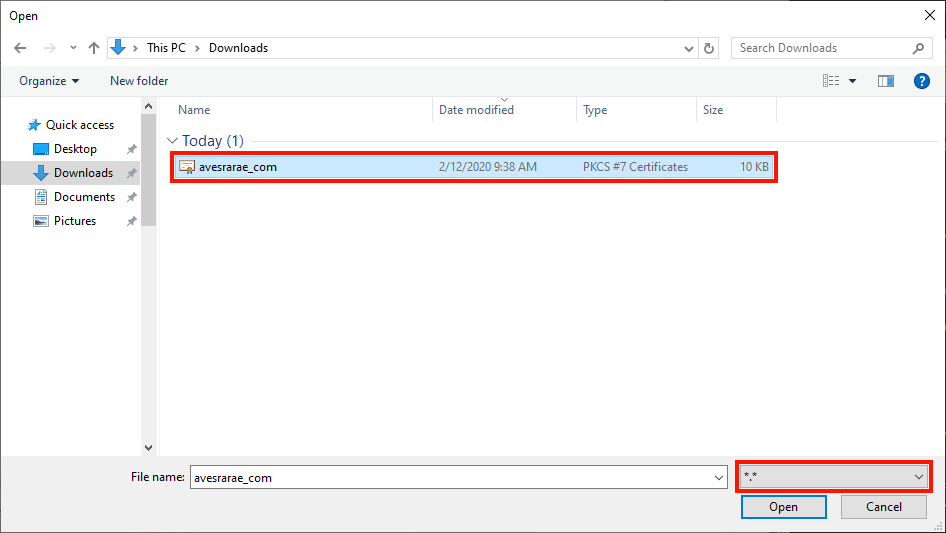
Step 8: Navigate to the certificate file
Open the folder where your downloaded files are stored. In the file explorer window, look for the "File name" field at the top. Next to the "File name" field, you'll find a drop-down menu that allows you to filter file types. By default, it may be set to "*.cer." Click on the drop-down menu and select "." instead. This option will display all file types. Scroll through the list of files in the folder, and you should now be able to see the .p7b file you downloaded from SSL.com.
Step 9: Open the file
Click the Open button.
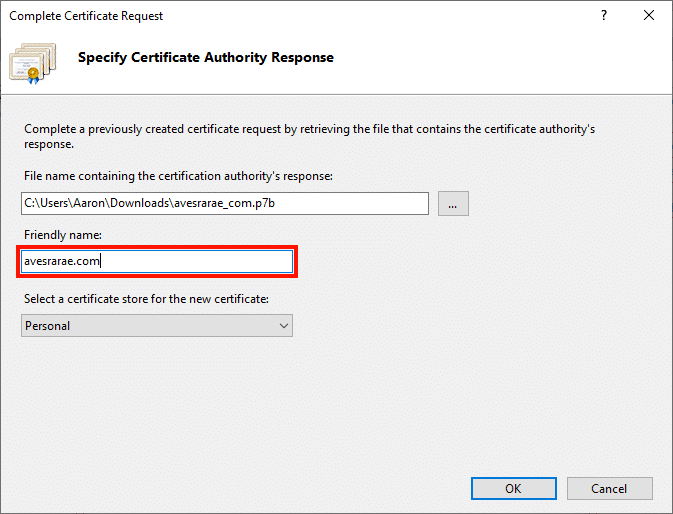
Step 10: Create A Friendly Name
Please provide a unique and easily recognizable name for the certificate in the "Friendly Name" field. In this case, we are entering the certificate's common name as the memorable name.
Step 11: Click OK
Click the OK button.
Step 12: Last Step
Your SSL certificate is installed now. You can run an SSL checker tool to confirm the validity and proper installation of the certificate. After SSL certificate installation in Windows, bind it to the specific website or domain for which it was issued. In the IIS Manager, locate the website's bindings and add a new binding for HTTPS, selecting the installed certificate. You can follow binding steps to easily finish the process. Then, you need to redirect your website from HTTP to HTTPS.
Potential SSL Installation Issues
While the install SSL certificate Windows process is usually straightforward, some common issues may arise. After successfully installing your website security certificate and redirecting to HTTPS, it is important to test your website for common issues that may arise after installation. Here are the key problems to identify and resolve:
SSL certificate not found: If your SSL certificate is installed incorrectly, visitors to your website may encounter an error message indicating that the certificate is not found.
HTTPS redirect failure: Improper configuration of SSL can result in a failure to redirect visitors to the HTTPS version of your site. This can lead to an error message being displayed when users try to access your website.
SSL certificate mismatch: An error message may occur if your site has not been properly validated before completing the SSL certificate installation in Windows. This can cause compatibility issues and disrupt the secure connection.
Mixed-content errors: If your website's source code includes resources, such as images, videos, stylesheets, or scripts, that are being pulled in using the insecure HTTP protocol instead of HTTPS, your site may not load correctly. This can lead to a mixed-content error and compromise the security of your website.
It is essential to address these issues promptly to ensure that your SSL certificate for website is functioning correctly and your website is secure for your visitors. Sometimes, troubleshooting such issues may require technical expertise. It's recommended to consult the documentation provided by your SSL certificate provider or seek assistance from their support team.
If you find the SSL certificate installation in Windows process overwhelming or lack the technical knowledge, consider leveraging the expertise of Dserver's experienced professionals. Our team of experts will handle the entire SSL certificate installation process, ensuring a seamless and hassle-free experience for you. Focus on your core business activities while we take care of your website's security.
Conclusion
You need to install an SSL certificate for enhancing your website's security and build trust with your users. By following the step-by-step guide outlined in this blog post, you can successfully install an SSL certificate in Windows and test if it has been done completely. Remember to address any potential installation issues promptly and seek professional assistance when needed. Safeguard your website, protect user data, and establish a secure online presence with a website security certificate. You must check the SSL installation process without the control panel on the Windows server to know all steps.